  |
||
 |
 |
 |
 |
 |
||
| reference articles | competition journal | piping links | FAQ | contact me |
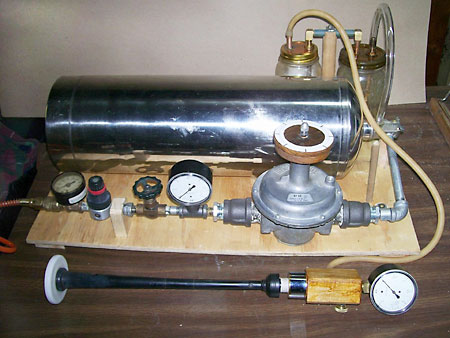
Andrew's Tips: Mechanical Chanter Reed Break-InBy Andrew T. Lenz, Jr., Santa Cruz, California, ©2009-2011 So you have a chanter reed that is too hard and you are a nut who likes to play with hardware and mechanical stuff and the thought of making a chanter reed break-in device gets you psyched, this article is for you. First off, why break in a reed artificially? Well, of course, you can simply sand or scrape a new reed to the ideal hardness right off the bat. Problem is, your reed is probably a bit dry and you can't really judge what your reed is going to do after a few weeks of—unnaturally comfortable—playing during which time it will soften up further. The vast majority of pipers who sand/scrape their new reeds leave their reeds a bit too hard and only make further adjustments after playing them for a week or two. Some pipers just gut it out and break in a new reed by simply playing it until it is comfortable—some reeds for just a few minutes at a time over the course of months. Sometimes, all you need to do is give a new reed a pinch to get you through your practice session. The conventional wisdom is that reeds with more cane will last longer than reeds that have less—and, of course, everyone wants their reeds to last as long as possible! (Though also keep in mind that conventional wisdom is not always correct nor will not always apply to all cases—but you can pretty safely assume you'll have a stronger reed by leaving cane than removing it.) So what does mechanical break-in get you? A reed with a lot of cane but is easier to play and, if done correctly, a bit more humidified too. On the other hand, it takes purchasing some hardware and some assembly . . . and possibly tolerating some noise. My Contrivance I broke in a chanter reed in 2007 using a compressor and a relatively simple contraption.
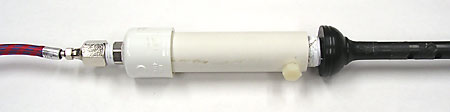
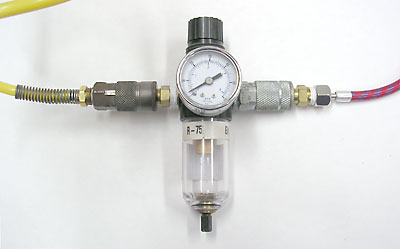
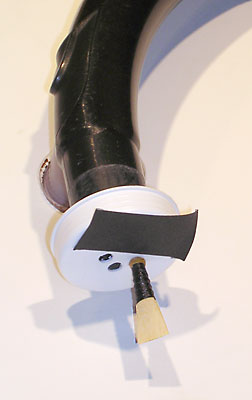
I made a chanter cap (a.k.a. "dry stock") out of PVC, drilled a hole in the top and added a fitting so I could attach it to an airbrush hose. It connected in the following order: To make the chanter cap, the PVC pipe I used had a 13/16" (20mm) inner diameter and a 1-1/6" (27mm) exterior diameter. I drilled a hole in the plastic end cap to fit a male/male metal fitting to attach to the air line. The chanter is hemped and wrapped with Teflon tape for an airtight fit with the cap. The cap doesn't really need a locking nut since the fit should be very snug; in my case, I'd made the cap previously to use as a typical true chanter cap, hence it already had the plastic nut. I wiped the exposed blades of the reed liberally with water using my finger, let it sit for about 10 seconds, then wiped off any standing moisture. I installed the reed in the chanter and put on the cap. I hooked up all the hoses then gradually increased the regulator pressure from zero up to the point where the reed kicked in a High-A, then I dropped the pressure to just above reed cut-out. (Some experimentation was required to determine the lowest possible setting on the regulator for this.) I found that if I left the reed sounding at the higher pressure, not too much later it closed up and stopped sounding. If I dropped the pressure, the reed would sound indefinitely.
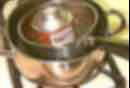
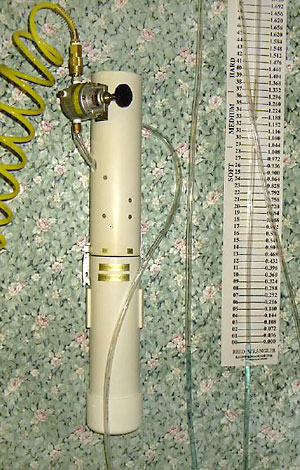
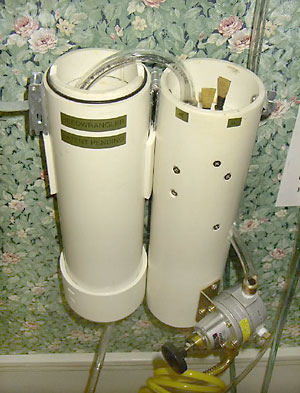
I had turned off the compressor after the tank (about 50 gallons/190 liters) was full, so I just let this contraption run until the tank drained. I did this at work after closing and just let it do its thing. With this set-up the tank emptied in about an hour . . . equal to some piobaireachd practice. I did this a couple days in a row and it greatly helped the reed ease up. Ideally, you'd want to tape the chanter to play different notes for each treatment—such as High-A, D, Low-A, etc. You don't want to let the reed run more than a person would typically practice, in other words, don't get impatient and run the reed overnight. I tried that once and the reed closed up and was unplayable. The reed was able to be a least somewhat resurrected by coaxing the blades back open by pinching the sides for weeks with a spring-loaded clip—I still have the reed, it recovered and is functional after its grueling all-night torture test. That said, don't count on an overplayed reed surviving. Oh, and being that I didn't want anyone to think that a burglar alarm was going off at work, I put the chanter in a tube—the airbrush hose run through a slit cut in the plastic cap—with padding around the sole end and loose balled up paper at the open end of the tube. Then I put that in a larger open tube, followed by another tube with one end sealed. All this to just dampen the sound some. You don't want to put it in a completely sealed tube or the back pressure will cause the reed to shut off.
Simple Compressor Connection
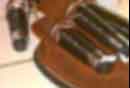
A really simple method of breaking in reeds is to get a practice chanter, put your new pipe chanter reed in it and very loosely tape the mouthpiece to a raw compressor hose. You'll want to allow some of the air to escape otherwise the reed will be overpowered and simply close up and stop working. Alternatively, you can get a thin plastic pipe or vinyl tubing, drill some holes in it and connect one end to the mouthpiece and the other to the compressor. Then you'll tape over some holes as needed to increase the pressure in the air line to the reed. The holes act as a very rudimentary bleeder valve allowing air to escape and dropping the air line pressure. Some small compressors put out inconsistent air pressure (often those compressors without tanks), so if you find this system doesn't work it may be an impossible configuration for your particular compressor. Vacuum Cleaner Now, some people have successfully used household vacuum cleaners to break-in new reeds. Then again, some people have successfully used new reeds to break household vacuum cleaners. (I've heard the stories!) If you have a vacuum that you don't mind possibly destroying, you can place a customized plastic cap over the hose of the vacuum. The cap should have a number of holes drilled in it, one to seat the reed into and the others to control the pressure. You turn on the vacuum and air is sucked through the reed and the holes into the hose. The reed may not sound if too much air is going through the auxiliary holes; in that instance you'll want to cover hole after hole with tape until the reed sounds, then once the reed is sounding try to uncover one of the holes a little to back off the pressure on the reed a bit while keeping it sounding. (You can get a good idea of the taping requirements by simply blocking the holes with your fingers while the reed is sounding.) You won't want to run the reed more than about 20 minutes at a time and you'll want to keep a very close eye—and ear—on the vacuum. A fire extinguisher and a bouquet of flowers for your wife might not be a bad idea either, just in case.
|
| sitemap | ||

